
About Stone Carvings Quests
Overworld quests that occur after recruiting Yahna.
Stone Carvings Quests are Overworld Quests that become available after recruiting Yahna (after completing "The Ravaged Swamp" main stage).
Acquire the Faded Journal.
To access the Carvings quests, you must first acquire the Faded Journals from various regions.
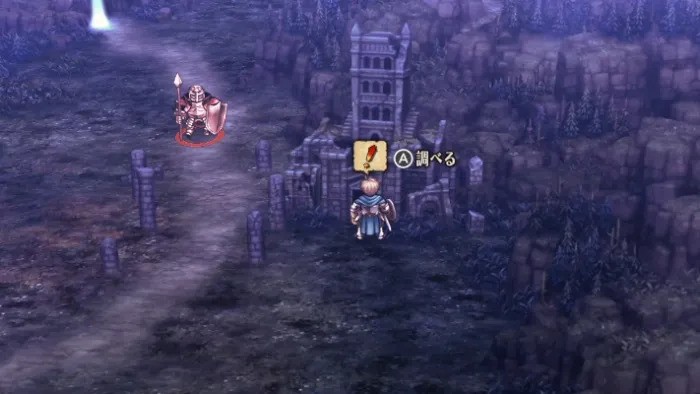
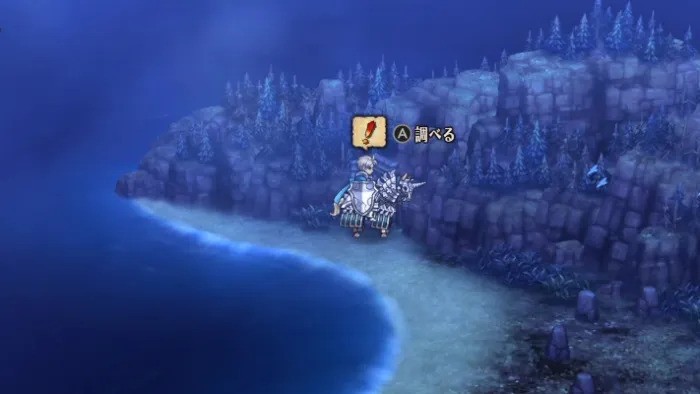
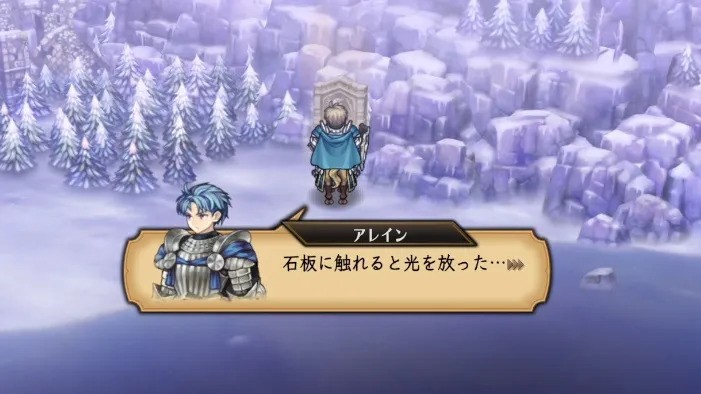
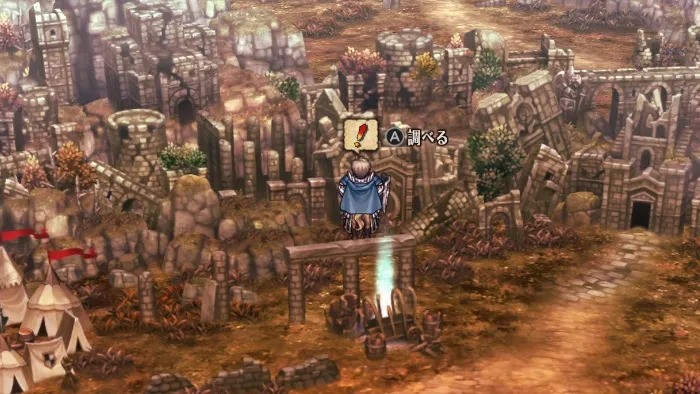
Examine the Carved Stones in the order listed in the Faded Journals.
If you examine the Carved Stones in the order written on the Faded Journals, the quests will be completed.
Please note that if you do not examine the Carved Stones in the correct order, you will have to start over again.
Where to Get the Carvings and Faded Journals
| Table of Contents | ||
|---|---|---|
| Cornia | Drakenhold | Elheim |
| Bastorias | Albion | |
Cornia Region
| Rewards | Kingsblade Cornix x1
Honors x5 War Funds 1000G |
|---|
▼Step-by-step Guide and Correct Order
| Order | Notes and Carved Stones |
|---|---|
| Journal | Faded Journal 3 |
| First Carving | Minotaur Carving |
| Second Carving | Mermaid Carving |
| Third Carving | Gryphon Carving |
| Fourth Carving | Unicorn Carving |
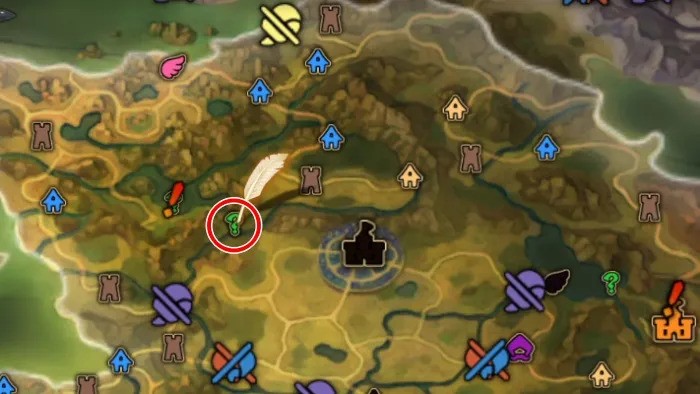
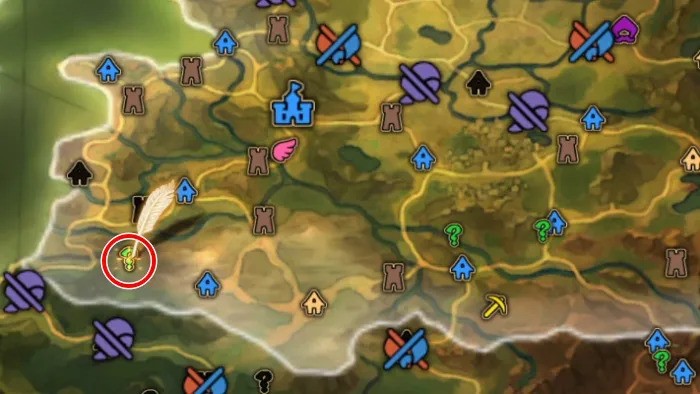
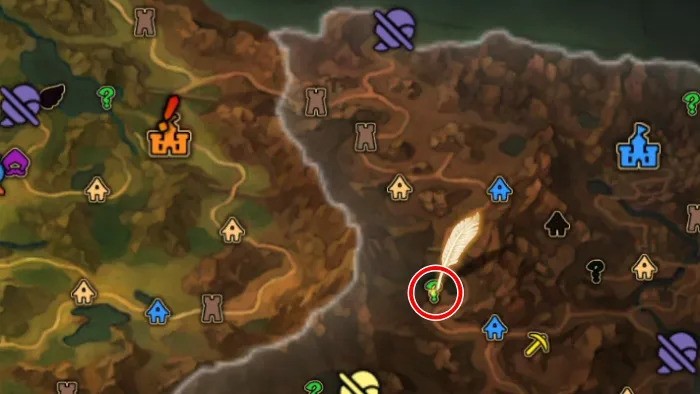
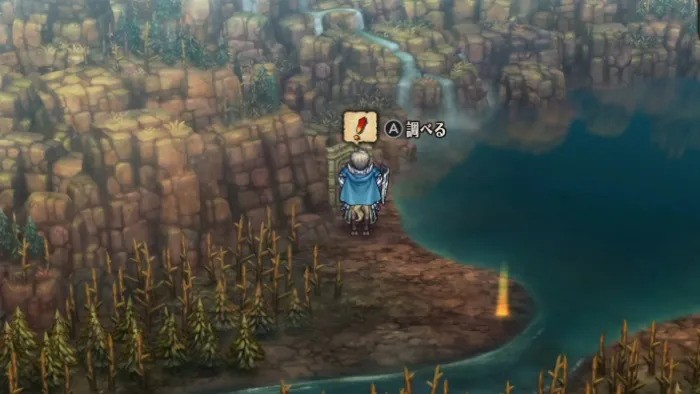
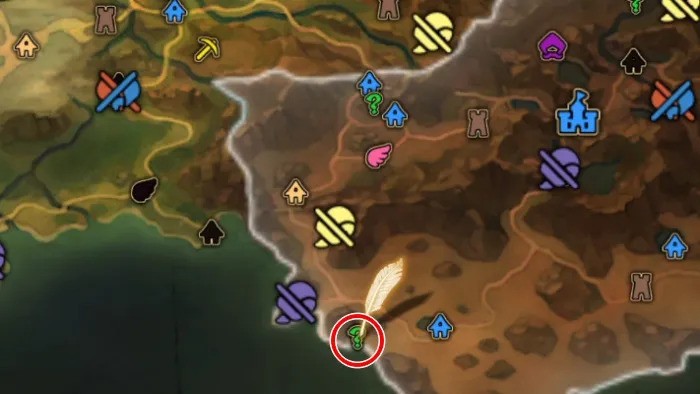
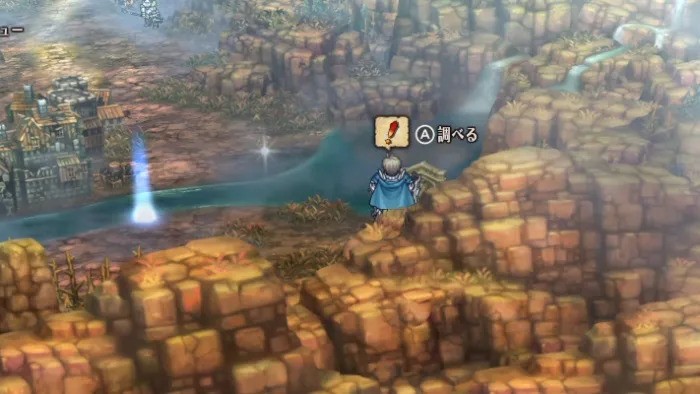
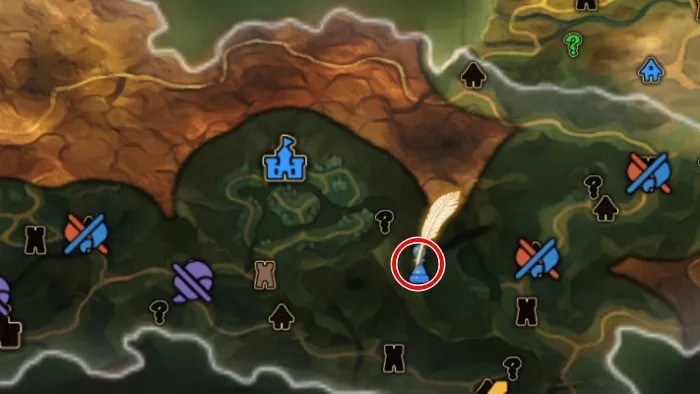
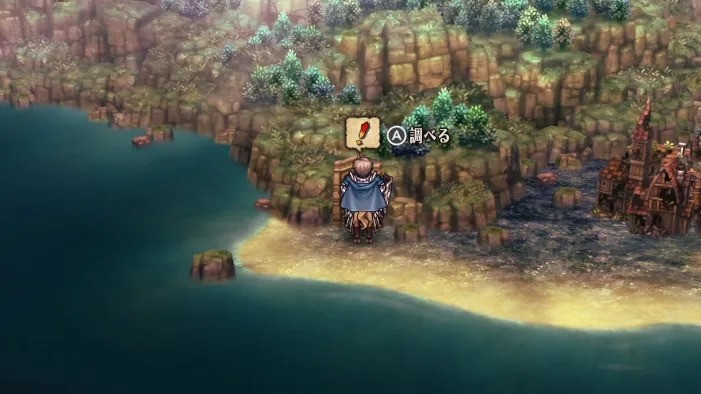
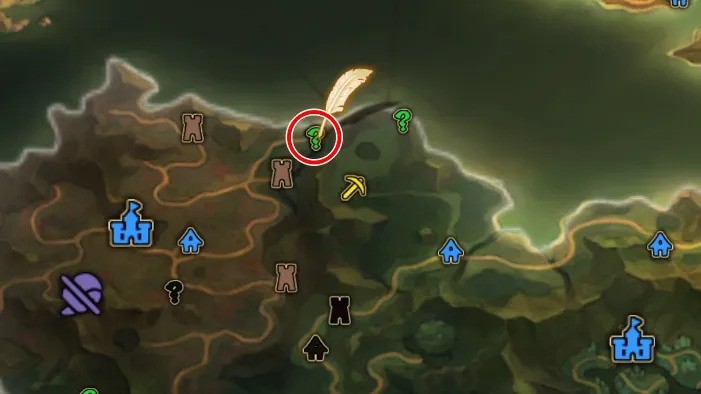
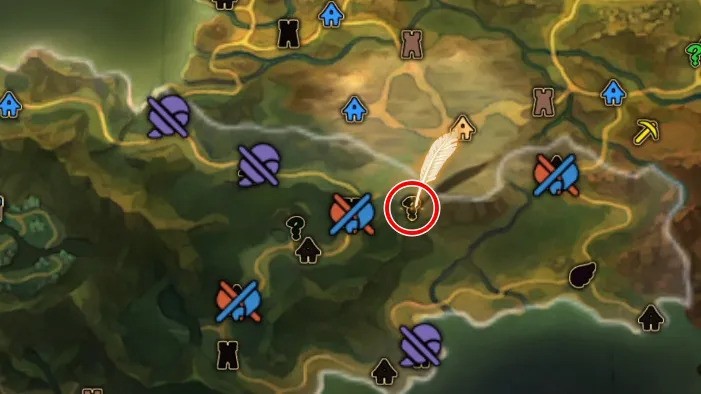
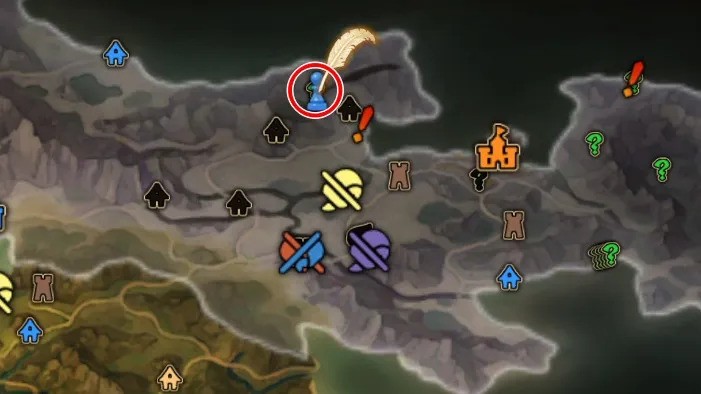
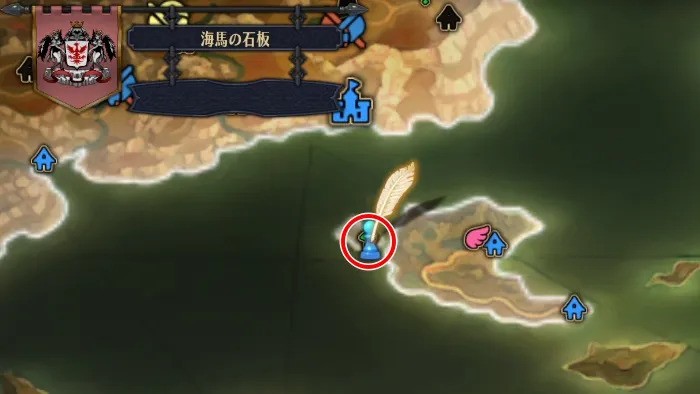
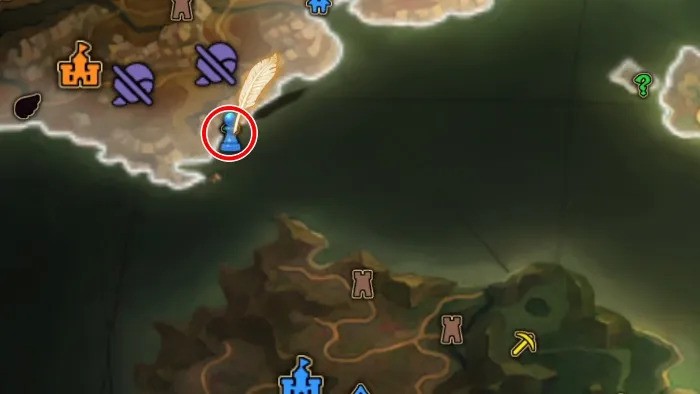
Faded Journal 3 Location
| Map | Where to Get |
|---|---|
 |
 |
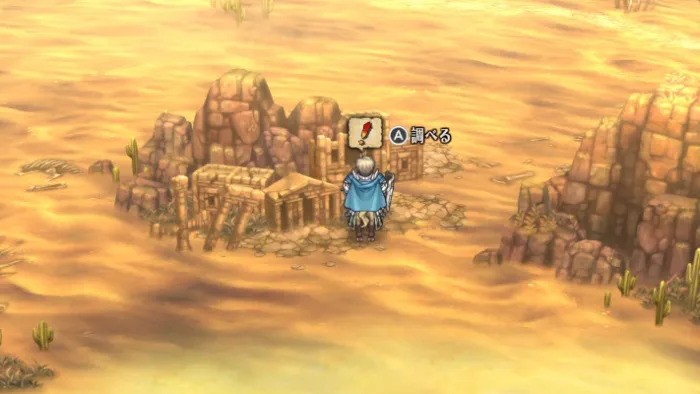
After successfully recruiting Yahna, get the "Faded Journal 3" from the ruins on the east side of Grupont Town.
Once you have "Faded Journal 3", follow the sequence below.
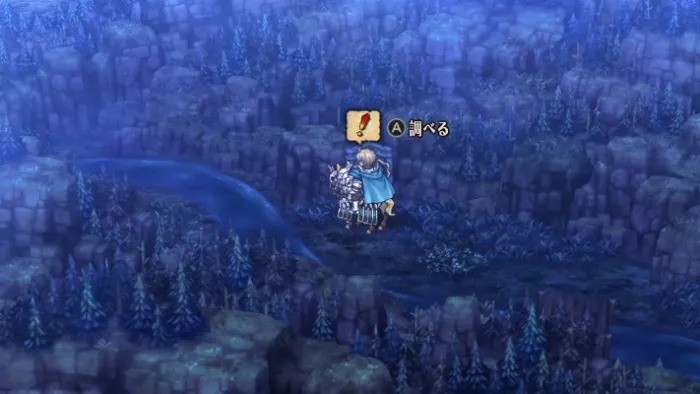
Step 1: Minotaur Carving
Step 2: Mermaid Carving
Step 3: Gryphon Carving
Step 4: Unicorn Carving
The quest will be cleared if you examine the Carvings in the order listed above.
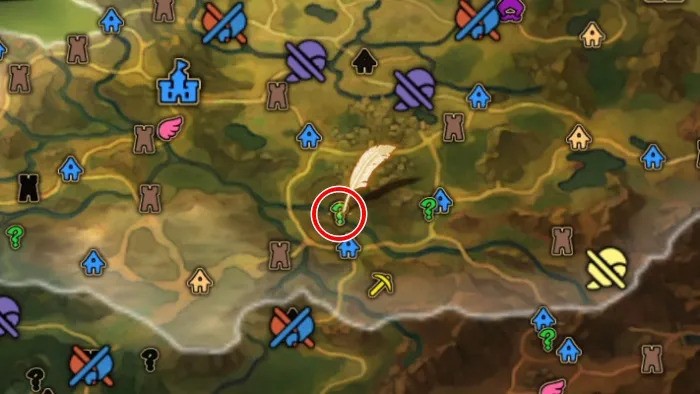
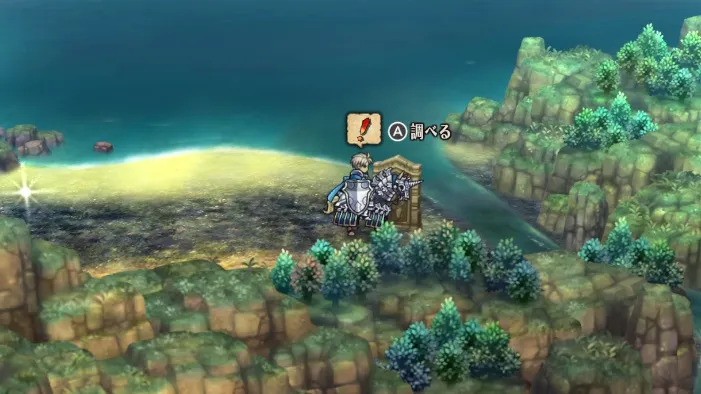
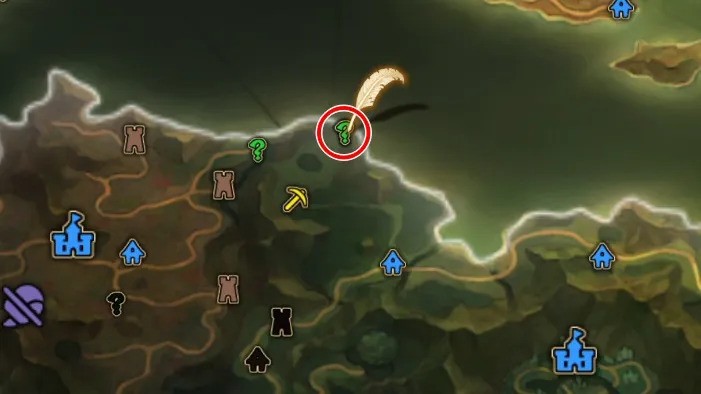
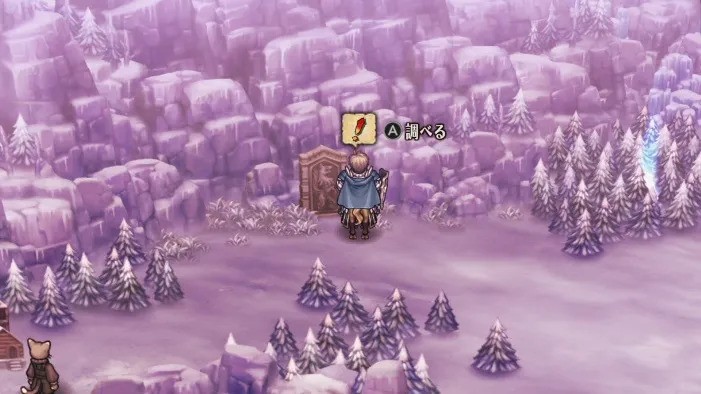
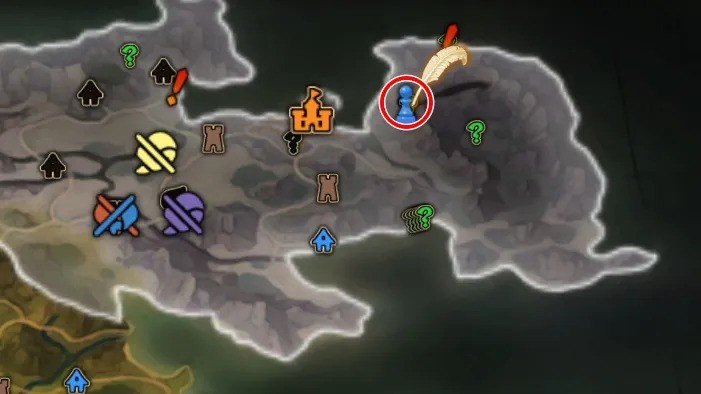
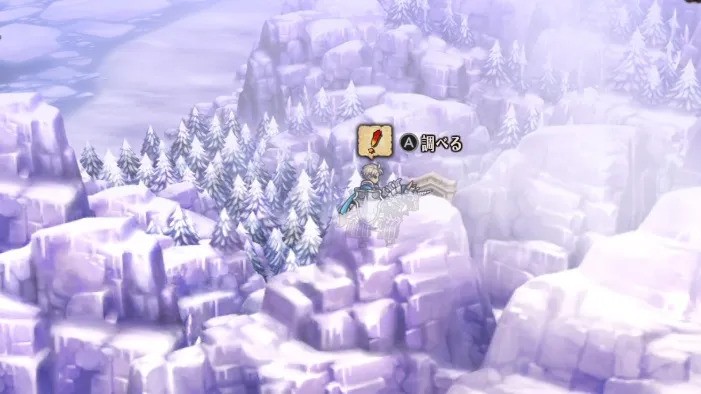
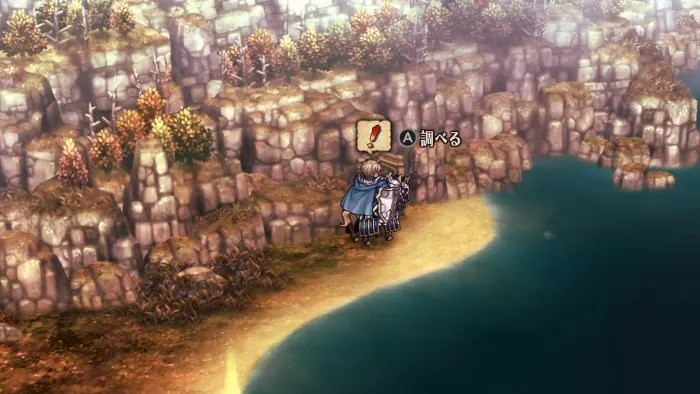
Minotaur Carving Location
| Map | Overworld |
|---|---|
 |
 |
Mermaid Carving Location
| Map | Overworld |
|---|---|
 |
 |
Gryphon Carving Location
| Map | Overworld |
|---|---|
 |
 |
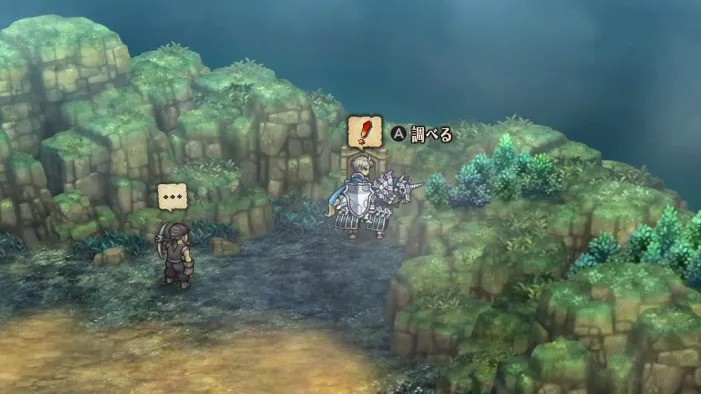
Unicorn Carving Location
| Map | Overworld |
|---|---|
 |
 |
Drakenhold Region
| Rewards | Kingsaxe Drakenash x1
Honors x5 War Funds 1000G |
|---|
▼Step-by-step Guide and Correct Order
| Order | Notes and Carved Stones |
|---|---|
| Journal | Faded Journal 4 |
| First Carving | Scorpion Carving |
| Second Carving | Reaper Carving |
| Third Carving | Cockatrice Carving |
| Fourth Carving | Wyvern Carving |
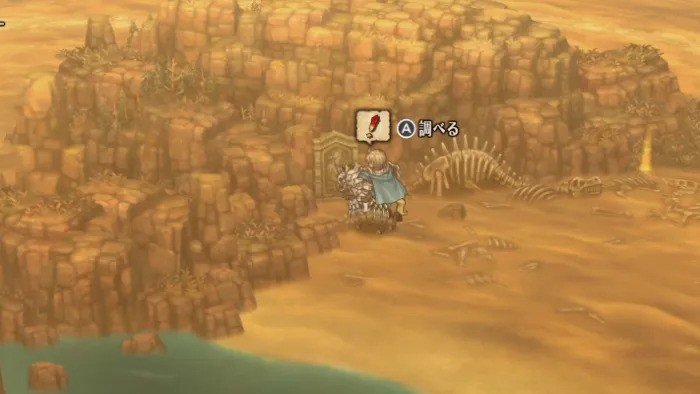
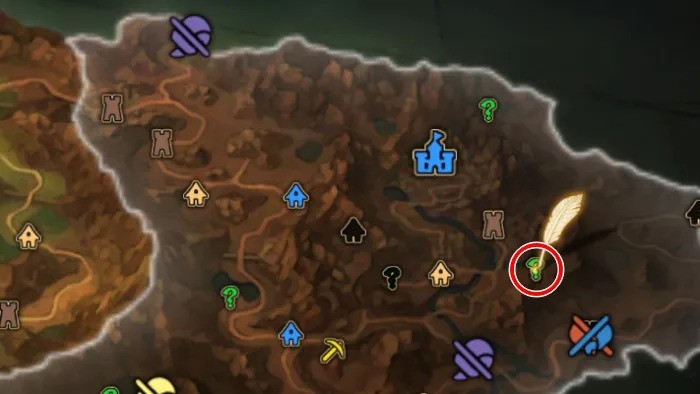
Faded Journal 4 Location
| Map | Where to Get |
|---|---|
 |
 |
After successfully recruiting Yahna, get the "Faded Journal 3" from the ruins on the southeast side of Gravemond Town.
Once you have "Faded Journal 4", follow the sequence below.
Step 1: Scorpion Carving
Step 2: Reaper Carving
Step 3: Cockatrice Carving
Step 4: Wyvern Carving
The quest will be cleared if you examine the Carvings in the order listed above.
Scorpion Carving Location
| Map | Overworld |
|---|---|
 |
 |
Reaper Carving Location
| Map | Overworld |
|---|---|
 |
 |
Cockatrice Carving Location
| Map | Overworld |
|---|---|
 |
 |
Wyvern Carving Location
| Map | Overworld |
|---|---|
 |
 |
Elheim Region
| Rewards | Kingslance Elhal x1
Honors x5 War Funds 1000G |
|---|
▼Step-by-step Guide and Correct Order
| Order | Notes and Carved Stones |
|---|---|
| Journal | Faded Journal 5 |
| First Carving | Faeries Carving |
| Second Carving | Cerberus Carving |
| Third Carving | Spectre Carving |
| Fourth Carving | Golem Carving |
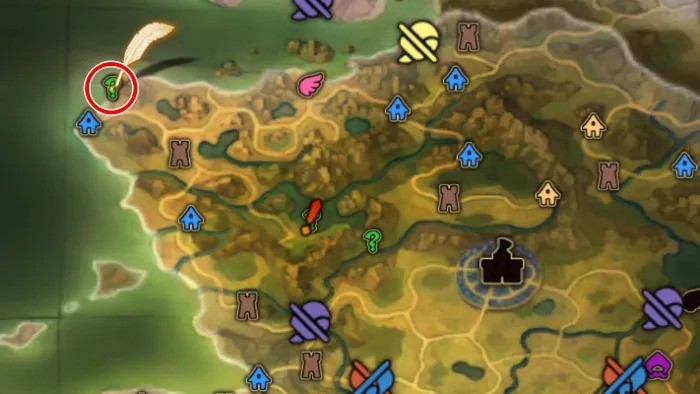
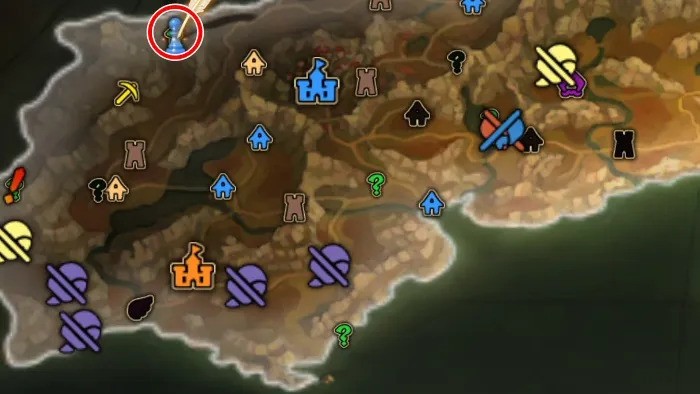
Faded Journal 5 Location
| Map | Where to Get |
|---|---|
 |
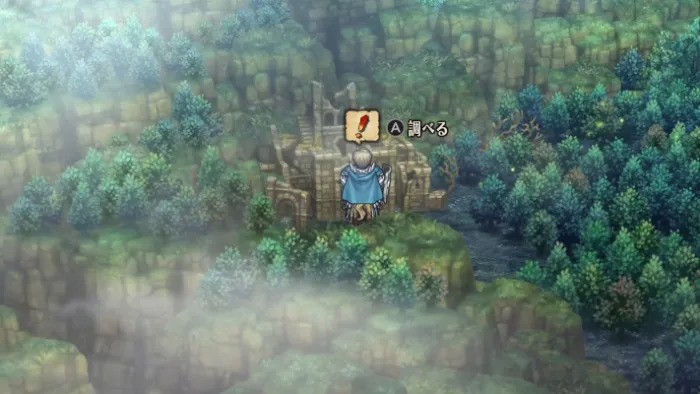 |
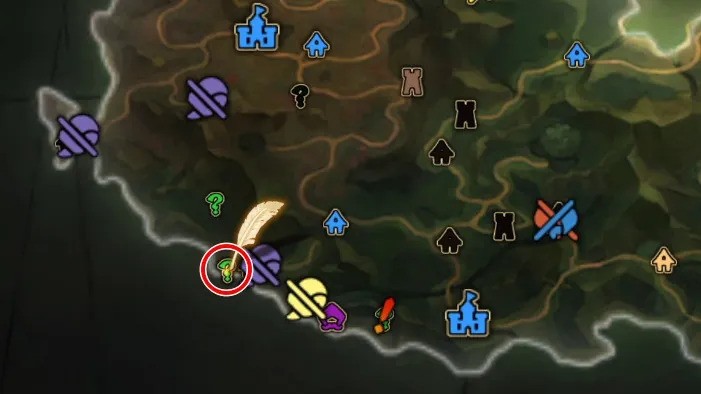
After successfully recruiting Yahna, get the "Faded Journal 5" from the ruins on the west side of Yaniss Town.
Once you have "Faded Journal 5", follow the sequence below.
Step 1: Faeries Carving
Step 2: Cerberus Carving
Step 3: Spectre Carving
Step 4: Golem Carving
The quest will be cleared if you examine the Carvings in the order listed above.
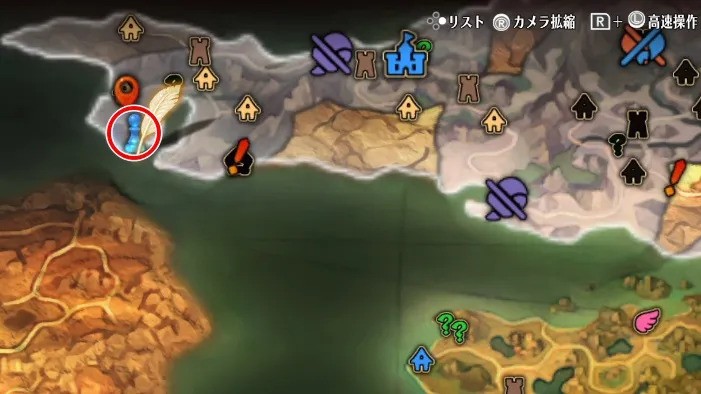
Faeries Carving Location
| Map | Overworld |
|---|---|
 |
 |
Cerberus Carving Location
| Map | Overworld |
|---|---|
 |
 |
Spectre Carving Location
| Map | Overworld |
|---|---|
 |
 |
Golem Carving Location
| Map | Overworld |
|---|---|
 |
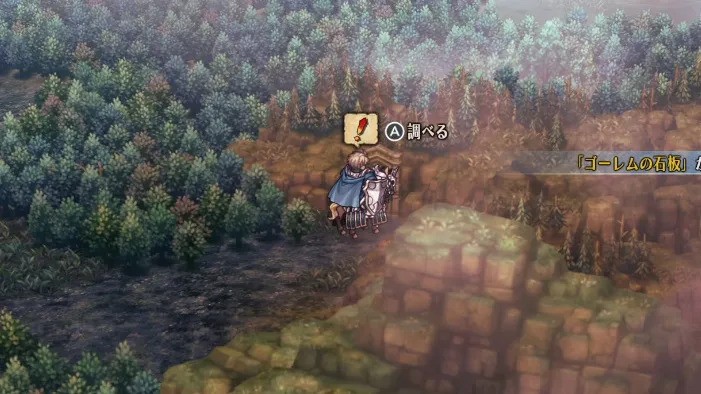 |
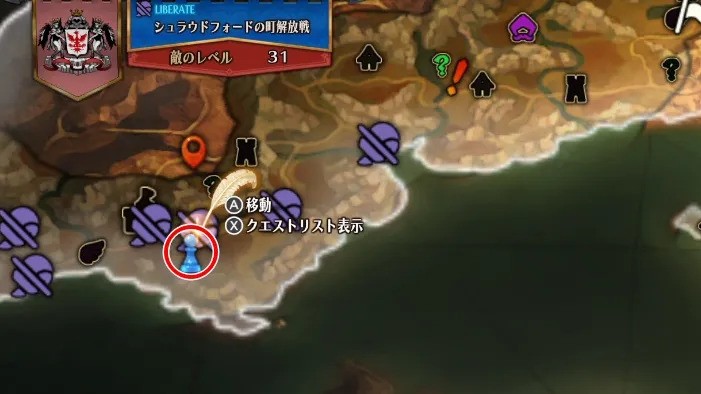
Bastorias Region
| Rewards | Kingsbow Bastorik x1
Honors x5 War Funds 1000G |
|---|---|
| Requirement | Requires completing "The Battle for Largion" Liberation Quest (Lvl. 31). |
▼Step-by-step Guide and Correct Order
| Order | Notes and Carved Stones |
|---|---|
| Journal | Faded Journal 2 |
| First Carving | Rat Carving |
| Second Carving | Eagle Carving |
| Third Carving | Wolf Carving |
| Fourth Carving | Bear Carving |
Faded Journal 2 Location
| Map | Where to Get |
|---|---|
 |
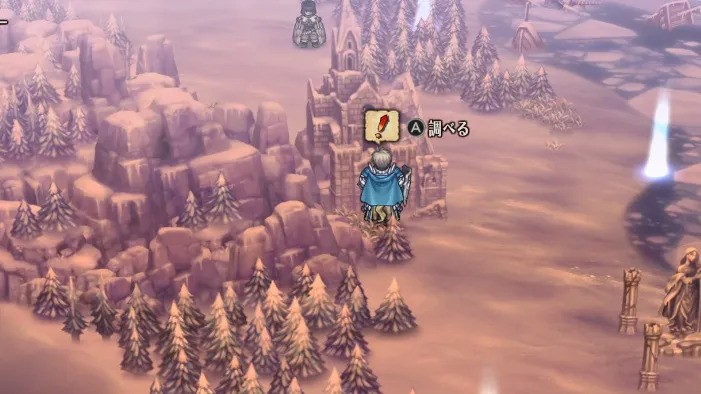 |
Rat Carving Location
| Map | Overworld |
|---|---|
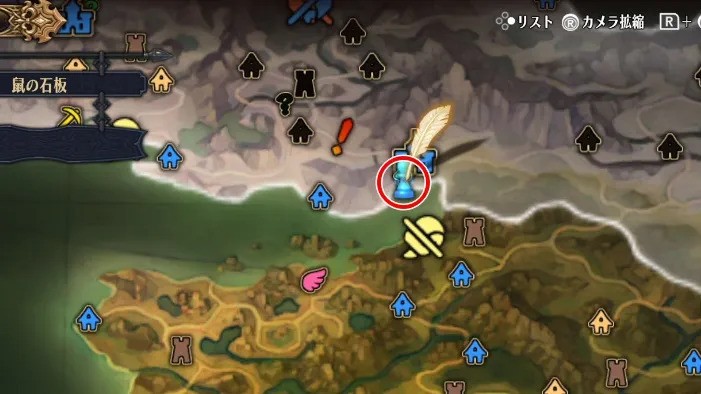 |
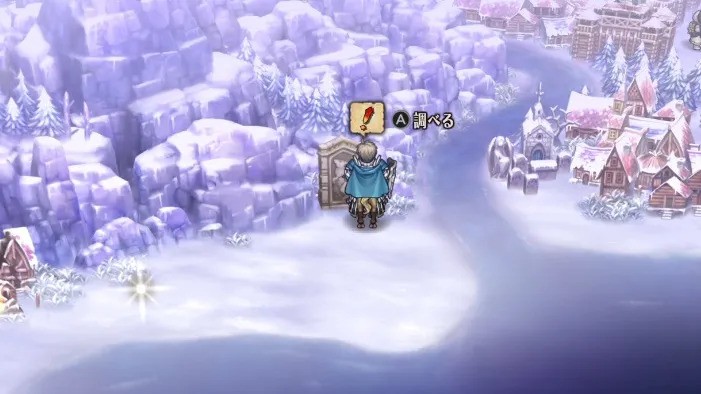 |
Eagle Carving Location
| Map | Overworld |
|---|---|
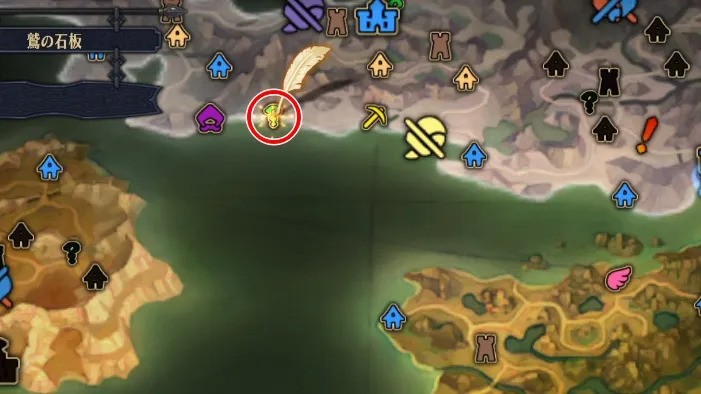 |
 |
Wolf Carving Location
| Map | Overworld |
|---|---|
 |
 |
Bear Carving Location
| Map | Overworld |
|---|---|
 |
 |
Albion Region
| Rewards |
Kingstaff Albiore x1 Honors x5 War Funds 1000G |
|---|---|
| Requirement | Requires completing "The Battle for Zagavona" Liberation Quest (Lv. 29). |
▼Step-by-step Guide and Correct Order
| Order | Notes and Carved Stones |
|---|---|
| Journal | Faded Journal 1 |
| First Carving | Serpent Carving |
| Second Carving | Hippocampus Carving |
| Third Carving | Goat Carving |
| Fourth Carving | Octopus Carving |
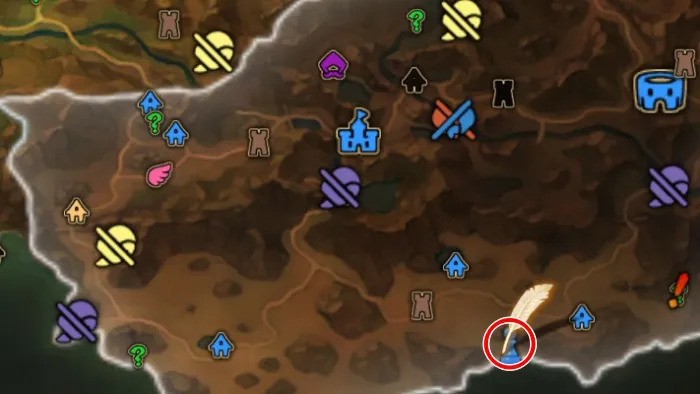
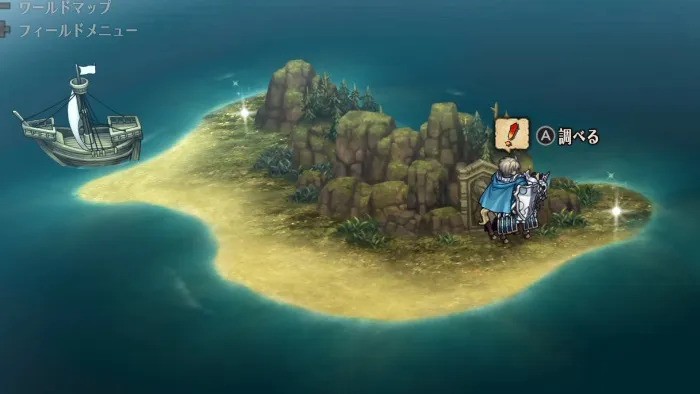
Faded Journal 1 Location
| Map | Where to Get |
|---|---|
 |
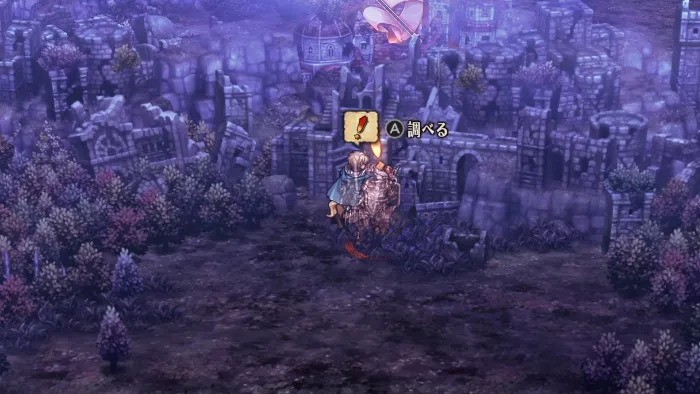 |
After successfully recruiting Yahna, get the "Faded Journal 1" from the ruins on the south side of Shroudford Town.
Once you have "Faded Journal 1", follow the sequence below.
Step 1: Serpent Carving
Step 2: Hippocampus Carving
Step 3: Goat Carving
Step 4: Octopus Carving
The quest will be cleared if you examine the Carvings in the order listed above.
Serpent Carving Location
| Map | Overworld |
|---|---|
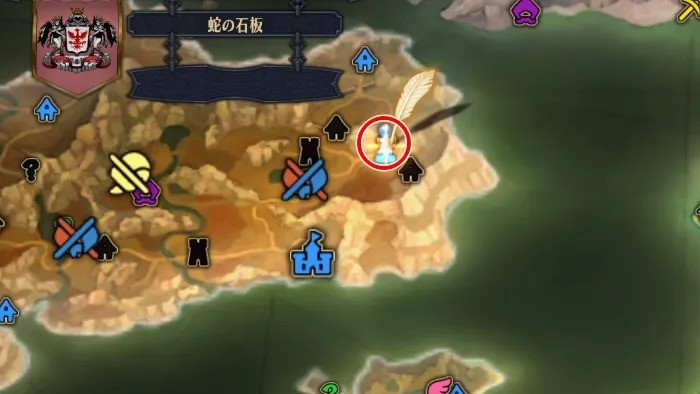 |
 |
Hippocampus Carving Location
| Map | Overworld |
|---|---|
 |
 |
Goat Carving Location
| Map | Overworld |
|---|---|
 |
 |
Octopus Carving Location
| Map | Overworld |
|---|---|
 |
 |


